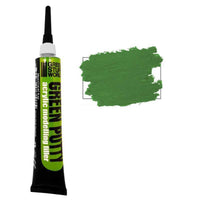
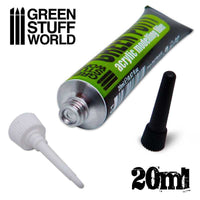
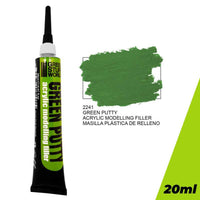
Green Stuff World Green Putty – Liquid Green Stuff Acrylic Modelling Filler 20ml
✨ Green Stuff World Green Putty
Professional Acrylic Gap Filler & Surface Smoother for Miniatures
🎯 What Makes This Essential for Your Workshop
Green Putty is a fine-grained, fast-drying acrylic modeling compound designed specifically for gap filling, surface smoothing, and detail corrections on miniatures and models. Unlike traditional putties, it stays exactly where you put it—no shrinking, no cracking—and dries hard enough to sand, carve, and paint over perfectly.
📋 Technical Specifications
🛠️ Practical Applications
🔧 Gap Filling & Seam Removal
Perfect for closing joints between model parts, especially those tricky seams on:
- Multi-part miniature assemblies
- Vehicle hull sections
- Building terrain pieces
- Resin kit connections
The liquid consistency flows into the smallest gaps, eliminating visible seam lines completely.
🎨 Surface Correction
Fix casting flaws and prepare surfaces for painting:
- Fill mold lines and casting bubbles
- Smooth rough resin surfaces
- Repair chipped or damaged details
- Create perfectly flat bases
After sanding, you'll have a glass-smooth surface ready for primer.
✏️ Detail Sculpting
Add small details and textures:
- Fabric folds on clothing
- Battle damage and weathering
- Small armor rivets
- Facial feature adjustments
Work it while wet or carve details after it hardens—your choice.
🏗️ Terrain Building
Essential for scenery and diorama work:
- Blend foam terrain sections
- Fill cracks in plaster castings
- Create smooth stone surfaces
- Repair damaged scenery pieces
Water-based formula makes it ideal for porous materials like foam and wood.
⭐ Why Modelers Choose Green Putty
Maintains exact shape and volume as it cures—no collapsing or cracking
Fine grain structure sands smoothly with any grit sandpaper
Accepts all acrylic paints, enamels, and lacquers without priming issues
Squeeze tube design lets you target tiny gaps without waste
Non-toxic, water-based, no harmful fumes—safe for indoor workspace
Quick drying means you can sand and prime the same session
📖 How to Use Green Putty
Step-by-Step Application
1. Prepare the Surface
Clean the area with soap and water or isopropyl alcohol. Remove any grease, dust, or mold release agents. Dry completely before applying.
2. Apply the Putty
Squeeze directly from the tube into gaps, seams, or defects. For small areas, use the tip precision. For larger areas, apply a thin layer with a wet sculpting tool or old brush.
3. Shape While Wet (Optional)
Use a damp tool, toothpick, or silicone shaper to smooth and shape. Keep tools wet—dip in water frequently. This is your chance to add textures or blend edges seamlessly.
4. Let It Cure
Thin applications: 30-60 minutes. Thicker fills: 2-4 hours. For best results, leave overnight before heavy sanding.
5. Sand & Finish
Start with 400-grit sandpaper for rough shaping, then move to 600-800 grit for smooth finish. The putty sands easily without clogging paper. Wipe dust off before priming.
6. Prime & Paint
Apply your standard primer. The putty accepts paint identically to plastic or resin—you won't see any difference in texture or coverage.
💡 Pro Tip: For deep gaps, apply in multiple thin layers rather than one thick application. Each layer dries faster and reduces the risk of surface cracking on extremely thick fills.
❓ Frequently Asked Questions
Can I use this on resin, metal, and plastic?
Absolutely. Green Putty adheres excellently to all standard modeling materials including plastic (styrene, ABS), resin (polyurethane, epoxy), white metal, pewter, and even wood or foam for terrain.
Will this shrink as it dries?
No. This is one of the major advantages of Green Putty over cheaper alternatives. It maintains its volume and shape throughout the curing process, which means gaps stay filled and surfaces stay flat.
How is this different from epoxy putty (green stuff)?
Epoxy putties are two-part compounds that remain workable for hours and cure into a rubbery, flexible finish—great for sculpting large details. Green Putty is single-component acrylic that dries faster and harder, making it better for gap filling, smoothing, and fine detail work that needs to be sanded.
Can I mix pigments or paint into it?
You can add small amounts of acrylic paint or pigment for tinting, but this may affect drying time and hardness. For most applications, it's better to use it pure and paint over it after curing.
What if the tip gets clogged?
If putty begins to dry in the nozzle, clear it with a pin or toothpick. Store the tube cap-down to prevent air pockets. If fully clogged, trim the tip with a hobby knife to reopen it.
Can I use this for large sculpting projects?
It's better suited for small to medium detail work and corrections rather than building up large volumes. For extensive sculpting, consider combining it with epoxy putty for bulk, then using Green Putty for final smoothing and details.
Does it work with airbrush primer?
Yes, perfectly. Once cured and sanded, Green Putty accepts brush-on, spray-can, or airbrush primers without any special preparation. It behaves exactly like the base material.
⚖️ Green Putty vs Other Gap Fillers
💡 Workshop Tips & Techniques
🔹 For Perfect Seam Lines
Apply a thin bead along the seam, then immediately smooth with a damp cotton swab or your finger. The moisture helps blend the edges. Work in sections on large models to maintain control before it starts setting.
🔹 Building Up Layers
For gaps deeper than 2mm, apply the first layer, let it cure completely, then add a second layer. This prevents surface tension cracks and speeds overall drying. Each layer should be 1-1.5mm maximum thickness.
🔹 Creating Smooth Curves
Use a damp silicone sculpting tool or rubber-tipped clay shaper to blend putty into rounded surfaces. The silicone doesn't stick to the wet putty, giving you complete control over contours.
🔹 Preventing Tool Sticking
Keep a small cup of water nearby. Dip your sculpting tools every few seconds. This thin water layer acts as a release agent and helps achieve ultra-smooth finishes.
🔹 Speed Up Drying
Place models under a desk lamp (not too close—heat can cause warping on plastic). Gentle warmth and air circulation can reduce drying time by 30-40%. A fan on low also works.
🔹 Combining with Other Putties
Green Putty pairs excellently with epoxy putty (Green Stuff, Milliput). Use epoxy for bulk sculpting, then apply a thin layer of Green Putty as a final smoothing coat. Sand the Green Putty for a perfect finish—much easier than sanding epoxy alone.
📦 Storage & Maintenance
- Store upright with cap tightly closed to prevent drying out
- Keep in a cool, dry place—avoid direct sunlight and extreme temperatures
- Clean tip after each use with a damp cloth to prevent buildup
- Shelf life: Approximately 12-18 months unopened; 6-12 months after opening with proper storage
- Reviving thick putty: If it thickens slightly, add 1-2 drops of water to the tube and shake well
📦 Package Contents
1× Green Stuff World Green Putty (20ml tube)
Precision applicator tip included • Water-based acrylic formula • Ready to use straight from the tube
✅ The Bottom Line
If you're serious about clean, professional-looking miniatures and models, Green Putty is a workshop essential. It eliminates visible seams, corrects casting flaws, and creates perfectly smooth surfaces—all without the hassle of shrinkage or difficult sanding. Whether you're preparing competition pieces or tabletop armies, this putty delivers consistent, reliable results every time.
20ml goes a long way—you'll reach for this tube on every project.
Our brands


